Coming Soon
This project is being tested and polished. Check back soon!
Parent info
Parts you need
Affiliate links — we may earn a small commission
Why MicroPython? (Skip the C++ pain)
If you’ve taken any Python class — at school, on Codecademy, from a YouTube tutorial — you already know enough to program a microcontroller. Most beginner hardware guides send you straight to Arduino and C++, which means learning a completely different language before you get to the fun part. MicroPython lets you skip that.
MicroPython is real Python running directly on the ESP32 chip. Not a simulator, not a translation layer — actual Python. The syntax is the same, the logic is the same, and best of all, you get a live REPL (Read-Eval-Print Loop) where you type a command and it runs instantly. No compile step, no upload-and-wait, no mystery error messages from the linker.
Here’s why this matters for getting started fast:
- You already know the language.
for,if,while, functions, lists — all the same. - Instant feedback. Type
pin.value(1)and the LED turns on. Right now. While the board is running. - No toolchain setup. No GCC, no makefiles, no board manager downloads.
- Great for prototyping. Try an idea in 30 seconds. Break it. Fix it. Ship it.
The honest tradeoff: MicroPython runs slower than compiled C++ and some advanced libraries don’t exist yet for it. For 95% of projects — sensors, displays, WiFi, BLE, motors — you will never notice. When you eventually hit a wall (high-speed signal processing, complex real-time control), you’ll have learned enough to make switching to Arduino feel easy.
What You Need
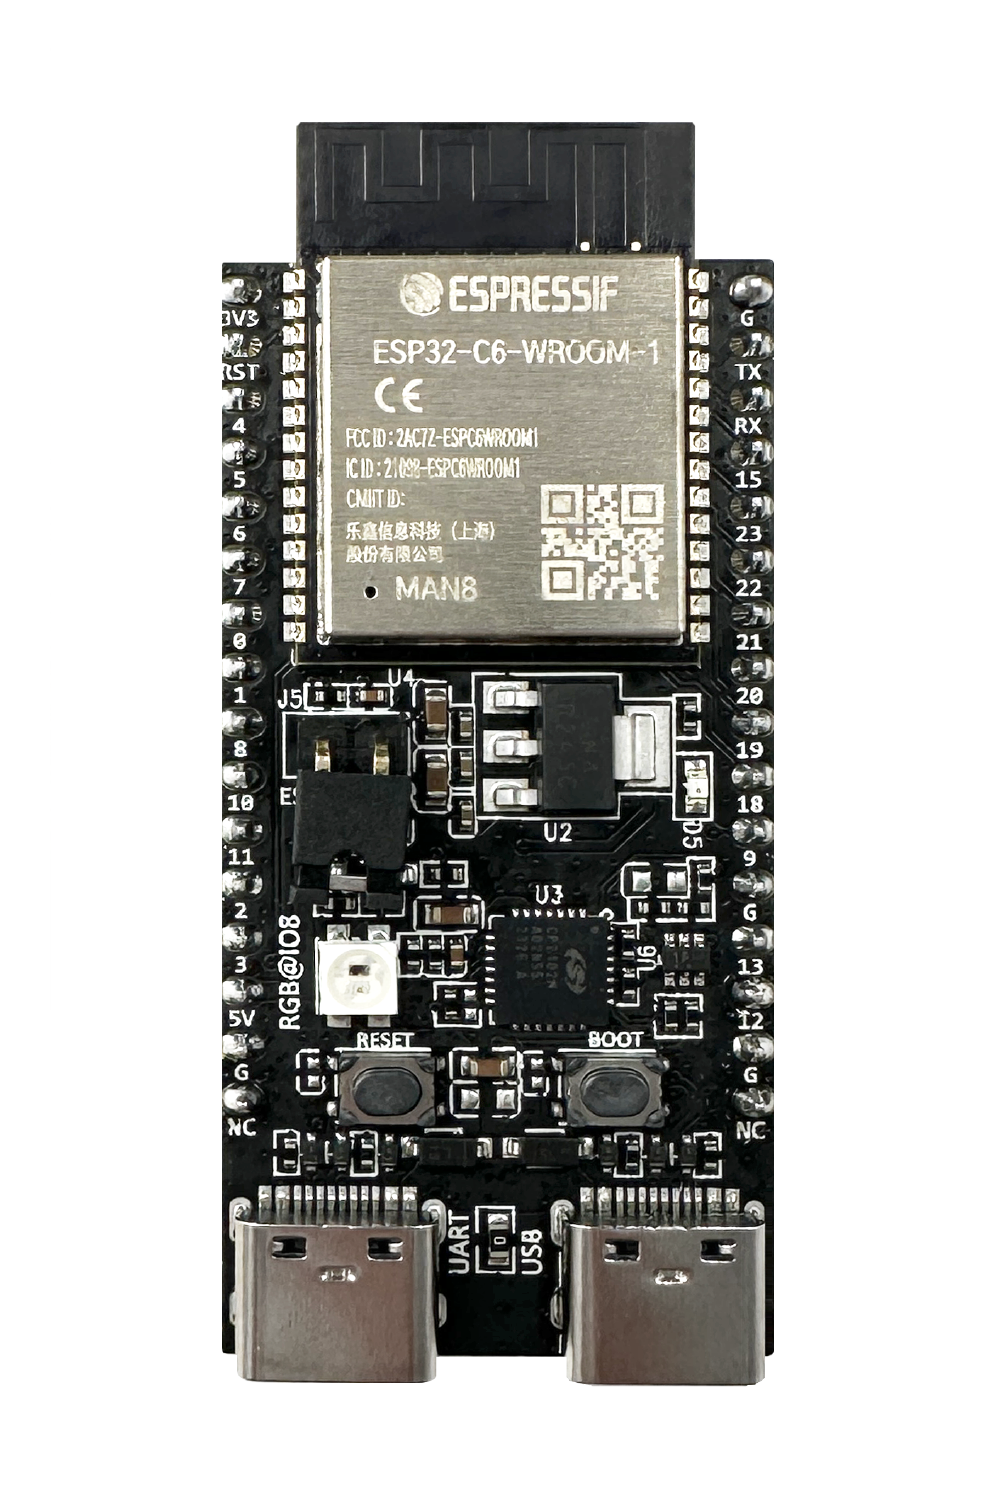
- ESP32 board — any variant works: original ESP32, ESP32-S3, ESP32-C6. If you’re buying new, the S3 or C6 are worth the extra dollar.
- USB-C data cable — not a charge-only cable. If the computer doesn’t see the board, the cable is probably the culprit.
- A computer — Windows, Mac, or Linux. You don’t even need to install an IDE if you use the web option below.
That’s the whole list. No breadboard required for the first steps.
Step 1: Flash MicroPython onto Your Board (5 min)
Your new ESP32 ships with Espressif’s default firmware, not MicroPython. You need to flash it once. After that, it’s permanent until you flash something else.
Option A: Thonny IDE (Easiest — recommended for beginners)
- Download Thonny from thonny.org — free, works on all platforms.
- Plug in your ESP32.
- Open Thonny, go to Tools → Options → Interpreter.
- Select MicroPython (ESP32) from the dropdown.
- Click Install or update MicroPython — Thonny downloads the right firmware and flashes it automatically.
Done. Thonny handles everything.
Option B: Manual flash with esptool
If you prefer the command line or Thonny doesn’t detect your board:
- Go to micropython.org/download and download the
.binfile for your exact board model. - Install esptool:
pip install esptool- Erase the existing firmware (replace
COM3with your port — on Mac/Linux it’s something like/dev/ttyUSB0or/dev/ttyACM0):
esptool.py --port COM3 erase_flash- Flash MicroPython:
esptool.py --port COM3 write_flash -z 0x0 esp32-20240602-v1.23.0.binOption C: Web flasher (No install at all)
Espressif has a browser-based flasher at labs.espressif.com. Works in Chrome or Edge. Connect your board, click flash, pick your firmware. Useful if you’re on a school computer where you can’t install software.
Step 2: Connect to the Board (2 min)
Once MicroPython is flashed, you need a way to talk to it. Three options:
Thonny IDE is the easiest. Plug in the board, select MicroPython (ESP32) as the interpreter, and Thonny connects automatically. You’ll see a >>> prompt at the bottom — that’s the REPL.
mpremote is a lightweight command-line tool:
pip install mpremote
mpremote connect
Web Serial works in Chrome with zero installation. Search for “MicroPython Web Serial REPL” — several browser-based terminals exist that connect directly to your board over USB.
For this tutorial, Thonny is assumed. If you use mpremote or Web Serial, the code is identical.
Step 3: Hello World — Talk to Your Board (1 min)
Click in Thonny’s shell panel (the >>> area) and type these one at a time, pressing Enter after each:
>>> print("Hello from ESP32!")
Hello from ESP32!
>>> import machine
>>> pin = machine.Pin(2, machine.Pin.OUT)
>>> pin.value(1)
>>> pin.value(0)
Pin 2 is the onboard LED on most ESP32 boards. When you ran pin.value(1), it turned on. When you ran pin.value(0), it turned off.
You just controlled hardware with Python. No setup(), no loop(), no compiling, no uploading. That’s the REPL — the killer feature of MicroPython for learning.
Note: Some boards use a different pin for the onboard LED (GPIO 48 on ESP32-S3, GPIO 8 on some C6 variants). Check your board’s pinout if pin 2 doesn’t work.
Your First Script: Blink
Typing into the REPL is great for experimenting, but you’ll want scripts that run automatically. In Thonny, create a new file, paste this, and save it to the device as main.py:
import machine
import time

led = machine.Pin(2, machine.Pin.OUT)

while True:
    led.value(1)
    time.sleep(0.5)
    led.value(0)
    time.sleep(0.5)
Any file saved as main.py on the ESP32 runs automatically every time the board powers up. Unplug it, plug it back in — it blinks on its own.
This is the MicroPython equivalent of Arduino’s setup() and loop() combined, except it’s just normal Python.
Five Starter Projects
Project 1: WiFi Scanner (5 min)
Find every WiFi network in range, sorted by signal strength. No router credentials needed — this is passive scanning only.
import network

wlan = network.WLAN(network.STA_IF)
wlan.active(True)

networks = wlan.scan()

for net in sorted(networks, key=lambda x: x[3], reverse=True):
    ssid = net[0].decode()
    rssi = net[3]
    secure = "OPEN" if net[4] == 0 else "LOCKED"
    print(f"{ssid:30} {rssi}dBm  {secure}")
Run this in the REPL or save as main.py. The network module is built into MicroPython — no library install needed. rssi is signal strength in dBm; higher (less negative) means stronger.
Project 2: Web Server with LED Toggle (10 min)
Control your LED from any phone on the same WiFi network. The ESP32 hosts a tiny webpage with On/Off buttons.
import network
import socket
import machine
import time

# --- Config ---
SSID = "YourWiFiName"
PASSWORD = "YourPassword"
LED_PIN = 2

# --- Setup ---
led = machine.Pin(LED_PIN, machine.Pin.OUT)

wlan = network.WLAN(network.STA_IF)
wlan.active(True)
wlan.connect(SSID, PASSWORD)

print("Connecting to WiFi", end="")
while not wlan.isconnected():
    print(".", end="")
    time.sleep(0.5)

ip = wlan.ifconfig()[0]
print(f"\nConnected! Open http://{ip} on your phone")

# --- Web server ---
addr = socket.getaddrinfo("0.0.0.0", 80)[0][-1]
s = socket.socket()
s.bind(addr)
s.listen(1)

HTML = """HTTP/1.0 200 OK\r\nContent-type: text/html\r\n\r\n
<html><body style="font-size:2em;text-align:center;margin-top:50px">
<h2>ESP32 LED Control</h2>
<a href="/on"><button style="padding:20px 40px;margin:10px">ON</button></a>
<a href="/off"><button style="padding:20px 40px;margin:10px">OFF</button></a>
</body></html>"""

while True:
    conn, addr = s.accept()
    request = conn.recv(1024).decode()
    if "/on" in request:
        led.value(1)
    elif "/off" in request:
        led.value(0)
    conn.send(HTML)
    conn.close()
Replace YourWiFiName and YourPassword, save as main.py, and reset the board. The IP address prints to the REPL — open it on your phone.
Project 3: Temperature Logger (10 min)
Read temperature and humidity every 5 seconds using a DHT22 sensor. The dht module is built into MicroPython.
import dht
import machine
import time

sensor = dht.DHT22(machine.Pin(4))

while True:
    sensor.measure()
    temp = sensor.temperature()
    humidity = sensor.humidity()
    print(f"Temp: {temp}C  Humidity: {humidity}%")
    time.sleep(5)
Wire the DHT22: VCC to 3.3V, GND to GND, data to GPIO 4 (with a 10k pull-up resistor to 3.3V, or use a module that includes one).
Bonus — save readings to a file on the ESP32’s flash:
import dht
import machine
import time

sensor = dht.DHT22(machine.Pin(4))

with open("log.csv", "a") as f:
    f.write("timestamp,temp_c,humidity\n")

tick = 0
while True:
    sensor.measure()
    line = f"{tick},{sensor.temperature()},{sensor.humidity()}\n"
    print(line, end="")
    with open("log.csv", "a") as f:
        f.write(line)
    tick += 5
    time.sleep(5)
The file persists across reboots. Download it from the board in Thonny via File → Open → MicroPython device.
Project 4: NeoPixel Rainbow (5 min)
If your board has onboard NeoPixels (ESP32-S3-DevKitC has one on GPIO 48, many boards have a strip), the neopixel module is built in.
import neopixel
import machine
import time

NUM_PIXELS = 8
PIN = 48  # Change to match your board

np = neopixel.NeoPixel(machine.Pin(PIN), NUM_PIXELS)

while True:
    for i in range(NUM_PIXELS):
        np[i] = ((i * 32) % 256, (i * 64) % 256, (i * 96) % 256)
    np.write()
    time.sleep(0.1)
Each pixel gets an RGB value calculated from its index, producing a rainbow pattern. Change the multipliers to shift the colors. np.write() sends the data — until you call it, the pixels don’t update.
For external NeoPixel strips, wire the data line to whatever GPIO you choose and update PIN to match.
Project 5: BLE Advertiser (10 min)
Make your ESP32 visible as a Bluetooth device. Any phone with a BLE scanner app (like nRF Connect, free on iOS and Android) will see it.
import bluetooth
import struct
import time

ble = bluetooth.BLE()
ble.active(True)

# Build advertisement payload
name = b"BuildCool ESP32"
adv_data = (
    bytes([2, 0x01, 0x06]) +           # Flags: LE General Discoverable
    bytes([len(name) + 1, 0x09]) +     # Complete Local Name
    name
)

ble.gap_advertise(100, adv_data)       # Advertise every 100ms

print(f"Broadcasting as: {name.decode()}")
print("Open nRF Connect on your phone and scan for devices")

while True:
    time.sleep(1)
The bluetooth module (ubluetooth on older MicroPython builds) is built in. For more complex BLE — GATT services, characteristics, notifications — look into the aioble library, which you can install with mip (MicroPython’s package manager):
import mip
mip.install("aioble")
MicroPython vs Arduino: When to Use Which
| Feature | MicroPython | Arduino (C++) |
|---|---|---|
| Setup time | 10 min | 15 min |
| Learning curve | Easy if you know Python | Medium — new language |
| Execution speed | Slower | Faster |
| Library ecosystem | Good, growing fast | Massive, battle-tested |
| REPL (instant commands) | Yes | No |
| Interactive debugging | Yes | Limited |
| Best for | Prototyping, Python lovers, rapid iteration | Production hardware, timing-critical, large community libraries |
| Verdict | Start here if you know Python | Switch if you hit performance limits |
The real answer: neither is better. They’re different tools. Start with MicroPython because it removes every obstacle between your Python knowledge and a working project. If you later need to drive a motor at 20kHz PWM or parse a complex radio protocol, you’ll have enough hardware intuition to pick up Arduino quickly.
What’s Next
Use AI to write your MicroPython code. When you ask ChatGPT, Claude, or any AI assistant for help, just add “use MicroPython” to your prompt. The AI knows MicroPython well — it can generate working sensor code, networking scripts, and display drivers. Check out our AI Prompt Cheat Sheet for the exact prompts that work best.
Build a smart home device. The ESP32-C6 adds Thread and Zigbee support on top of WiFi and BLE. Our ESP32-C6 Smart Home projects guide shows you how to build sensors that talk to Home Assistant — all in MicroPython.
Not sold on MicroPython? No problem. The Arduino path is solid and has a bigger community. Our Arduino quickstart guide gets you from zero to blinking LED in a similar amount of time — you’ll just be writing C++ instead.
Both paths lead to the same destination: making cool stuff. Pick whichever feels right, and switch later if you want to. The hardware skills transfer completely.
Parts used in this guide: ESP32-S3 or ESP32-C6 Dev Board (
$10-15) and a USB-C data cable ($5). Links above are affiliate links — they help keep this site free.